Quick, its Five Minute Friday and I've got a few hours to sneak a post in before times up. A few minutes if you count the time I plan to be awake much later tonight. So here's a little message about my Mama Made blog and why I spend a little time here...hoping you want to hang out here a little, too.
The thing is...when I became a housewife I didn't know a lick about making a home. I tried and failed many times in those early days and I'm still struggling through knowing how to run a home well as each season changes. When I became a mother...making home got amped up times 10. My attempts never outweighed my desire to do it well though. I love nothing more then creating home... home for my people, home for friends who enter here, home for our neighbors, home for all who enter. It's been a piece of my heart from the day I rented my first home as a young college newbie. I love to make home.
What home is though for so many is more then 4 walls and a place to sleep at night. It's a place to grow your heart. And that, my friends, looks very different to everybody. The beauty with making a home is we are all different in what we need to feel at home. I blog here to share some of my favorite things along the journey of home-making. I love to see nothing more then Mama's create their home and offer a safe heart landing place for all who enter. I truly enjoy home-making and believe that hearts are grown when the home is created with feeding the souls that hang in it.
I want our homes to be comfy and cozy and real and tasty and fun and creative and faith filled and family focused and life-giving. I keep trying things and sending some of what I love your way through this blog. Kinda like the messenger bringing you a little something to open up and try for yourself. You may love it. You may hate it. Either way, I know we can all give the message to our home dwellers that they are loved and valued and welcomed in the way we make home... What we do, how we live, and where we spend our time sends the message of home. I'm simply giving you what I love about home-making here so you can be the messenger in your house... making home as you give it all away.
Welcome to Five Minute Friday
We write for five minutes flat. All on the same prompt that Lisa Jo Baker post on her website starting at 10pm EST on Thursday night and all through Friday.
It started because Lisa-Jo had been thinking about writing and how often our perfectionism gets in the way of our words. And she figured, why not take 5 minutes and see what comes out: not a perfect post, not a profound post, just five minutes of focused writing.
So now on Fridays a group of people who love to throw caution to the wind and just write without worrying if it’s just right gather to share what five minutes buys them. Just five minutes.
Your words. This shared feast.
It’s easy to join in. Link up on Facebook here!

From your family table to what hangs on your walls. Homemade goes hand in hand with family, but it doesn't have to be perfect. Take back the art of family meals together, evenings gathered in your cozy family room, and the simplicity of home-making. From my best chocolate chip cookies to how to create your own living space...I'm cheering you on here and sharing a few tips along the way!
Friday, June 13, 2014

Wednesday, June 11, 2014
Blueberry Greek Muffins
It's the time of year when berries all across the state are ripe and fresh and oh, so sweet. I'm addicted to berries this time of year, all kinds. But one of my favorite is the blueberry! Warm blueberry muffins right out of the oven could be one of the things served in heaven as far as I'm concerned. Along with loving blueberries, I also love exploring in the kitchen. It's like an art, really. One everybody can play around with. That's the beauty of foods... its a fun way to express your preference and your taste buds and your creativity. There aren't too many kitchen experiences you can't give something to or take something away...
Today I fell in love with the blueberry muffin all over again. Here's my latest masterpiece...
Blueberry Greek Muffins
(Easy 1-2-3 Directions)
1. Mix together: 2/3 C Sugar, 1 Tsp Baking Powder, 1 Tsp Baking Soda, 1/2 Tsp. Salt, 2 Large Eggs, 4 Tbsp. melted butter, 1 Tsp Vanilla, 1 1/2 Cups Greek Vanilla Yogurt, 2 Tbsp Raw Honey. Whip this until a smooth, creamy consistency.
2. Add in to your above ingredients: 2 Cups Flour, 1 Cup Raw (plain) Oats. Throw in 1 Cup fresh or frozen Blueberries.
3. Spray a muffin pan, spoon muffin batter evenly amongst muffin cups, and bake at 350 for about 15-25 minutes. Depending on your muffin size!

Pre-wash fresh berries and taste as you go...:Obviously :)

Sprinkle dry oats on the top right before you bake them for a finished look to your muffins.

And serve to all your big and little people around the table. Especially the littlest. They're my favorite.
As always, serve with joy in your heart...a smile. Enjoy!
Thursday, June 5, 2014
3 easy ways to say Welcome!
No matter what stage of life we are in, our home is one place we can all open doors up at. Whether it's a a few minutes or a few days...home is one of our easiest places to invite people into our lives. Mama's often set the tone for home. Saying welcome to friends and family need not be a time to cover up imperfections or hide the mess. Saying welcome can come easily when you first open your heart before you open your door. There are some very easy solutions to making a welcome come naturally for you when those beloved guests arrive...
1. Nothing says "we're glad you're here" better than fresh flowers. Pick them from your yard, buy them at the market, or arrange a handful of them on a walk through the woods. Wherever you pick your bouquet from, simply set them as a center-piece on the table, place them on your kitchen counter, or have them by the front door. Fresh flowers always say welcome. By the bedside for over-night guests is cozy, too!

2. A first glimpse into a home is always calming and comforting when you first see... nothing. Cleared counter-tops, empty tables, and clean spaces give a calming effect to those living in your space. Spend 10 minutes and clear off your counters, wipe down the table, and give the impression you have room to invite people in...because you do. Walking into a cluttered, over-stimulated home often leaves guests feeling a tad bit unsure of their warm welcome. Cleaning counters is an easy way to make that welcome a happy one.

3. And last, and maybe most important. Just be real. So sometimes the flowers can't be cut and the counters still have dishes on them and the floors are a kid marked mess. Remember, it doesn't have to be perfect to just let people in. A little realness makes us feel comfortable, like we're just home. Live in your space, let those who come in see the real way you do just that, and be yourself. A cup of coffee over a milk stained floor can go a long way...

Open your doors today. Tomorrow. Sometime soon. Home is meant to be lived in together. Mama's make home happen when they say...welcome!
Monday, May 12, 2014
Krispie Coconut Cookies
Around here we eat pretty healthy. But don't get me wrong. We enjoy foods, too. Food brings people together and sometimes that means whipping up what most consider "good" food. and everybody considers cookies good food!
I love coconut and peanut butter in home-made granola bars. And these coconut cookies with rice krispies is one of my kids favorites...as well as the kids from the neighborhood who finds themselves in our yard this time of year. I can see why...
Butter.

Home-made baking.

Gallops of peanut butter.

Rice Krispies for the crunch effect!

Perfectly even baking on stoneware. (Ya'll should get a stone pan if you haven't yet!)

Perfection. Well, to this peanut butter, coconut, crunchy eating gal anyways.

Warm up the oven and throw these out today!

Krispie Coconut Cookies
1 c. unsalted butter, softened
1 c. white sugar, granulated (I cut back to 1/2)
1 c. brown sugar, tightly packed
1/2 tsp. salt (I hand tossed in, estimate here)
1 c. shredded unsweetened coconut
2 c. Rice Krispies
2 large eggs
1 tsp. vanilla extract
1/2 c. Peanut Butter
2 c. all-purpose flour
1 tsp. baking soda
2 c. oatmeal (I used old fashioned rolled oats here.)
1 c. unsalted butter, softened
1 c. white sugar, granulated (I cut back to 1/2)
1 c. brown sugar, tightly packed
1/2 tsp. salt (I hand tossed in, estimate here)
1 c. shredded unsweetened coconut
2 c. Rice Krispies
2 large eggs
1 tsp. vanilla extract
1/2 c. Peanut Butter
2 c. all-purpose flour
1 tsp. baking soda
2 c. oatmeal (I used old fashioned rolled oats here.)
Preheat oven to 350°.
Cream butter and sugars until light and fluffy. Add eggs, peanut butter, and vanilla. Hand stir in flour, soda and salt. Fold in coconut, oatmeal and Rice Krispies, mixing just until you have a firm dough. Shape cookies into large balls (approximately 2 tablespoons of dough per cookie) and arrange on a stoneware or baking sheet. Bake cookies for 13-15 minutes.
We especially love these warm out of the oven. One of my go-to cookies for after school snacks! And when doing that...serve with a smile and enjoy! :)
Wednesday, April 9, 2014
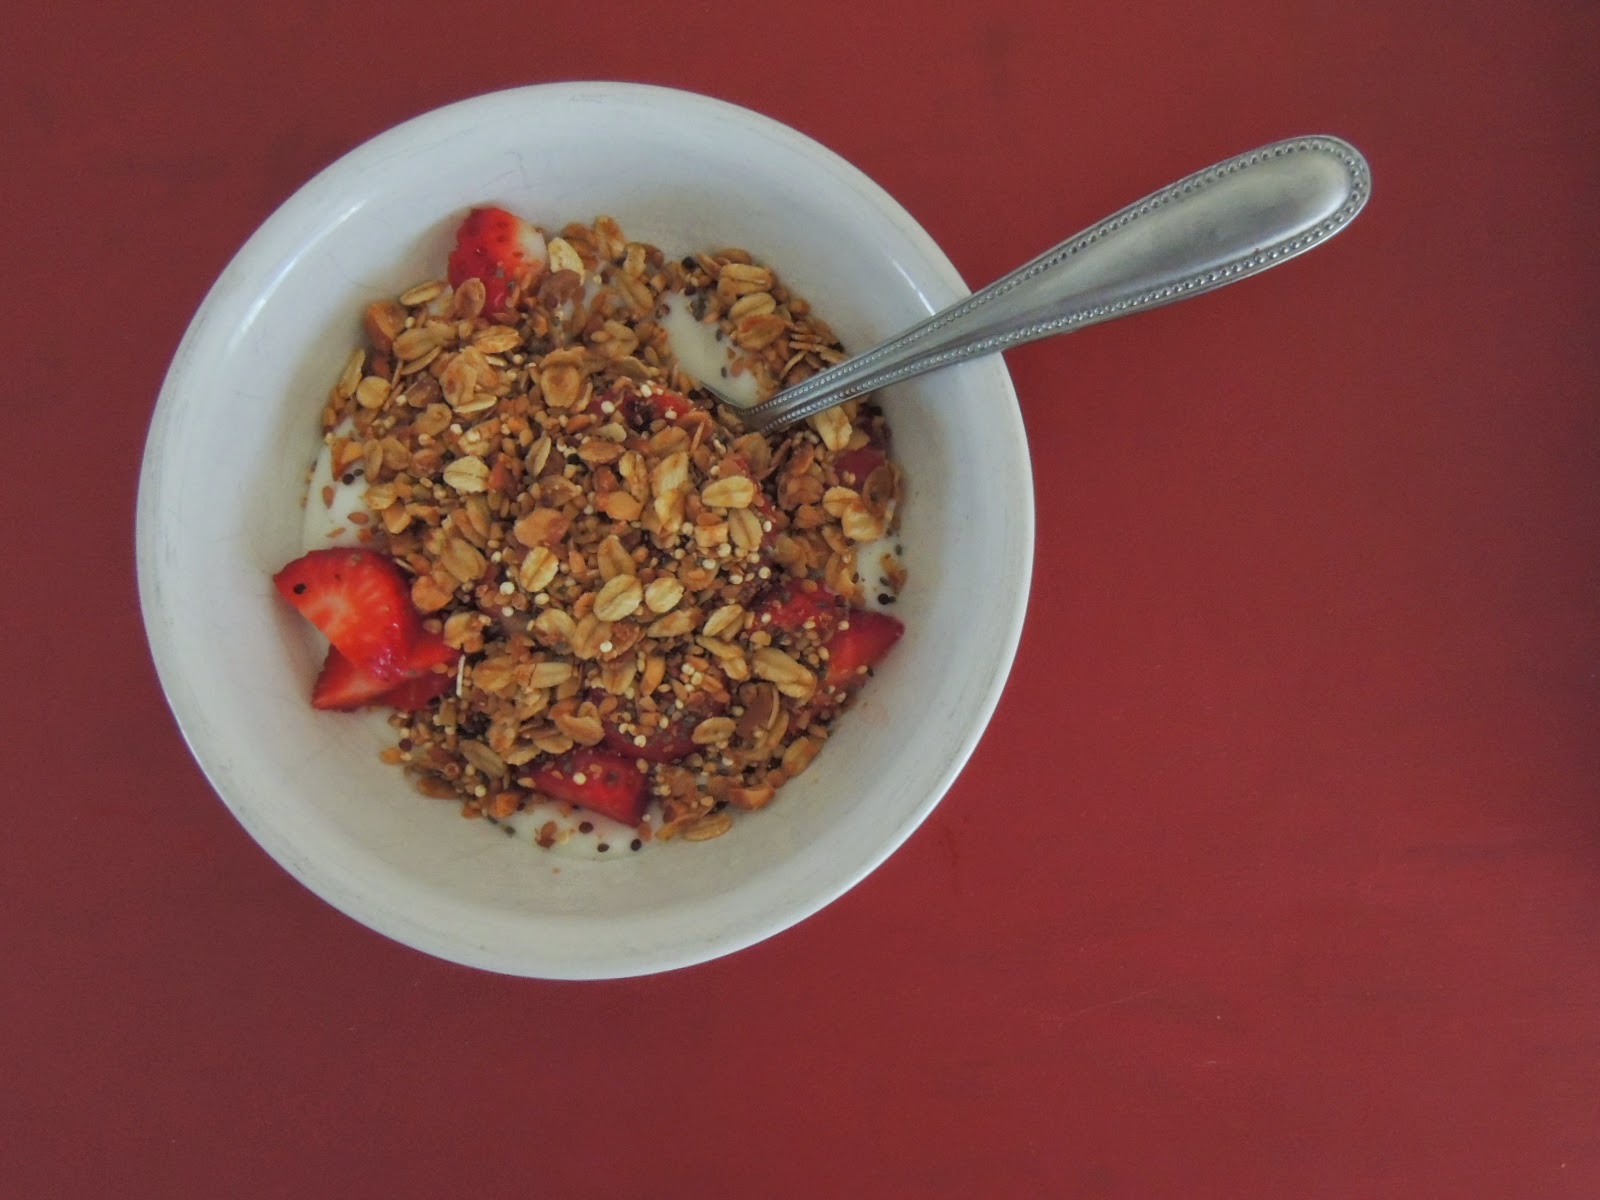
superfood granola
.png)
As a food junkie, crunchy food during the week is a must. Just something about a tasty, crunchy treat that makes my mouth happy! I have a really bad habit of throwing things in a pan and guessing how it will turn out. It makes a really good habit though of discovering new ways to indulge in some of the boring old basics. Home-made granola is not a new trick in the kitchen, but I had fun playing around with some good ole super-food granola. Crunch (plus) toasty oats (plus) good for you (equals) perfection! Well, perfection for this gal's taste buds... you can be the judge of your own :)

You'll need:
1 Cup Rolled Oats
1/2 Cup Steel Cut oats
1/2 Cup uncooked Quinoa
3 Tbsp. Flax Seed
2 Tbsp. Chia Seed
1 Cup chopped Raw Almonds
1 Cup chopped Raw Cashews
1/2 Cup Raw Sunflower Seeds
1 Tbsp. Cinnamon
2 tsp. Vanilla
2 Tbsp. Raw Organic Honey
3 Tbsp. Virgin Coconut Oil (heated to liquify)
Easy Directions:
In a large bowl combine dry ingredients.
Blend heated coconut oil with your honey and vanilla.
Drizzle your wet mix over your dry ingredients. Stir well.
Layer on a baking stone or baking sheet/pan.
Sprinkle with a pinch of salt (I didn't measure, just sprinkled)
Bake at 250 for about 2 hours, stirring a few times as it bakes.
And simply serve with a smile and enjoy!
Saturday, April 5, 2014
friday night pizza dough
I blogged about this before. It's one of my most asked for recipes though, so here it is again! I love traditions and my kids love pizza. Someday Friday nights will be filled with too many things to have us all home at the same time for family pizza night. I know we will go through seasons when one or two or five of us will have commitments outside of home. But I am hoping that by building these early traditions of a simple home-made pizza and movie night, that Friday nights will eventually bring us all back together. Traditions don't have to be fancy or big or overly planned... they just have to mean something to you and yours. You can do anything! Just build traditions! Or eat pizza on Fridays. Both are fun.
Friday Night Pizza Dough
2 1/4 tsp. active dry yeast
1 tsp brown sugar
1 1/2 cups warm water
1 tsp salt
2 Tbsp olive oil
3 1/3 cups flour (unbleached white and whole wheat is what I use)
Dissolve yeast and sugar in water. Let sit 10 minutes. Stir in salt, oil, flour. Knead, form ball. Let dough rise to doubled its size. Roll out. Use favorite toppings, bake at 425, 15-20 minutes.
2 1/4 tsp. active dry yeast
1 tsp brown sugar
1 1/2 cups warm water
1 tsp salt
2 Tbsp olive oil
3 1/3 cups flour (unbleached white and whole wheat is what I use)
Dissolve yeast and sugar in water. Let sit 10 minutes. Stir in salt, oil, flour. Knead, form ball. Let dough rise to doubled its size. Roll out. Use favorite toppings, bake at 425, 15-20 minutes.
Saturday, October 19, 2013
Caramel Corn
It has only taken me 11 months, 15 days, and 1 week to finally post this recipe for my most patient friend. Okay, I don't know the exact numbers, but I do know she asked for this recipe almost a year ago! I remember making this, capturing the photos, and laying the dirty spilled on recipe card...??? Well that's just it. I did not remember where I placed the recipe card at. For months. Until I opened my pie recipe book this fall and there nestled in nicely between freshly picked cherry pie and sweet potatoe filling was the surprise of my caramel corn recipe. Still stained and much more then book-mark worthy and bringing the thoughts of my patient friend all back to me while I saved it from the pie book and placed it safely back in it's "Sweet Things" recipe box spot. So here it is, friend...sorry it took so long!
Caramel Corn (worth waiting for :)
6 Quarts Popped Corn
1 Cup Butter
2 Cups Brown Sugar
1/2 Cup Light or Dark Corn Syrup
1 Tsp Salt
1/2 Tsp Baking Soda
1 Tsp Vanilla
Directions:
1. Preheat oven to 250. Coat large baking pans with cooking spray. Place your popped corn in the pans.
2. In a stove top pan slowly melt butter, stir in brown sugar, corn syrup, and salt.
3. Bring to a boil, stirring occasionally.
4. Boil without stirring for 5 minutes.
5. Remove from heat and stir in baking soda and vanilla.
6. Pour over your popcorn and mix well together.
7. Bake for 1 hour stirring every 15 minutes.

Do not use margarine or some light thing... only the real good stuff.

Get your kids involved for this one!

Especially since the science experiment with the baking soda looks so cool...

Mix well so every kernel gets some lov'in

And use a plenty big enough pan for stirring it around...

And as always, serve it with a smile and enjoy!
Tuesday, July 2, 2013
Frozen Fruit Cups
I know, right... it's been awhile! That's why the return of my posting to this food blog is such a fun yummy one for a summer day such as this! I have been making these frozen fruit cups for years and my kids, my hubs, and whoever else is here when we get them out of the freezer love them. My favorite is the frozen banana pieces, my firstborn is all about the strawberries, and my second boy loves the slightly melted juice that shows up as it gets munched on. Whichever it is, you are sure to love every melting moment of this treat!
Frozen Fruit Cups
1 can frozen pineapple juice, 12 oz, thawed
1 can frozen orange juice, 6-12oz, thawed
1 Cup water or apple juice
1/2 Cup Sugar (optional)
2 Tbsp. lemon juice
3-4 Medium firm bananas, sliced
1 Quart Fresh strawberries, sliced
1 can Mandarin Oranges, drained
1 can Crushed Pineapple
18 Clear plastic cups (or I use about 12 9oz cups and 10 small clear plastic dixie cups for kid sized servings)
Directions
In a large bowl prepare all your above ingredients. Stir well together. Spoon 3/4 full cups with the fruit mixture. Simply freeze in the freezer (setting them on a pan is helpful to avoid tipping). Ready to serve frozen fruit cups in a few hours! As always, serve with a smile and enjoy!!

A yummy, fruity filled frozen option on summer days!

I love having a freezer full of these!

Enjoy!
Monday, March 25, 2013
Homemade Granola
In our house, we eat a lot of yogurt. There are so many tasty yogurt options and most the time we love to pile ours with fresh berries, raw honey, and granola! I came across this granola recipe from my Southern Cooking recipe book, made only a couple small changes, and it is so good...especially warm out of the oven! (And might I add, anything Southern style is usually delish! But this one you actually don't feel too guilty eating!!) I doubled this recipe for our family of 5 and it is already time to bake some more.
Homemade Granola
3 Cups uncooked regular oats
1/2 Cup flaked coconut
1/2 Cup natural sliced almonds
1/4 Cup regular wheat germ
1/4 Cup plus 2 Tbsp. Raw Honey
1/4 Cup Vegetable oil
2 Tbsp. Brown sugar
1 tsp. Vanilla extract
1/4 tsp. Salt
(Optional- 3/4 Cup Raisins or Dried Cranberries)
1. Preheat oven to 350. Combine first 4 ingredients in a large bowl and set aside.
2. Combine your honey and next four ingredients. Pour over your oat mixture and stir well. Spread granola mixture onto a lightly greased 15 by 10-inch jelly-roll pan (or large stoneware which is what I used).
3. Bake at 350 for 25 minutes or until golden brown. Not dark brown. Stir every 5 minutes or so and stir raisins or dried fruit of choice in once done cooking.
4. Eat right away or store in an airtight container. (Also so tasty served warm with a little milk poured over it in a bowl...just like cereal :) And as always...serve with a smile and enjoy!

Thursday, February 21, 2013
Blueberry Donuts
My first memories with my husband are waking up at the crack of dawn to walk over to Dunkin Donuts in downtown Chicago and get freshly baked donuts. We were on a mission trip and somehow started almost every morning treating ourselves to one of his favorite sweets. So it comes as no surprise that our middle son has a love for donuts similar to his dad's and my house of boys has been known to drive 45 minutes one way to pick up an order of their favorite baked fresh donuts from the closest Donutland. When I realized there was such a thing as a donut pan and you could bake them, not fry them, I added this to my list of wants and our roomie gifted us with a set she found on clearance for Christmas! Yeah, we all benefit! I've tried a few recipes and tweaked it a bit...so far this is our fave. Though my boys will tell you they prefer chocolate chips in theirs over the blueberries....but this ole' mama likes to sneak in their fruit wherever I can!
Donuts
Preheat oven to 325. Mix all your dry ingredients in a bowl together. Add yogurt, eggs, vanilla, melted butter, and oil. Fold in your blueberries. Spray your donut pan with cooking spray. Fill each donut space 3/4 full (donuts will rise above). Bake 10 minutes or until donuts seem firm and pop out of your pan easily. Cool on wire rack or wax paper.
Glaze
Once donuts are cooled I like to drizzle this frosting topping over the top.

Donut pan! Best invention in the donut world!

Your cooling donuts...also pretty tasty warm!

Call the kids, it's time to eat! Serve with a smile and...enjoy!!
Sunday, January 27, 2013
Home-made Hamburger Buns (Quick)
If you have never attempted home-made bread before, don't let this scare you off! YOU can make these...I promise! Next time you grill, surprise your family with these perfectly baked hamburger buns fresh from your very own oven. It takes less then an hour and it is a perfect back-up if you forgot buns at the store.

Quick Hamburger Buns
2 Tbsp active dry yeast
1 cup plus 2 Tbsp warm water
1/3 cup olive oil
1/4 cup sugar
1 egg (room temp eggs work best)
1 tsp. salt (I like Kosher salt)
3 to 4 cups flour (I use basic white flour)
Directions:
1. I like to use a glass bowl to dissolve yeast in the warm water. Add your sugar and oil here and let stand for 5-10 minutes.
2. Add the egg, salt, and enough flour to form a soft dough (should not be sticky).
3. Roll onto a floured surface and knead until smooth, about 3-5 minutes. (I put butter on my hands to help keep dough from sticking to me and form together better). You do not have to let it rise.
4. Divide dough into 12 balls and place on a greased stone-ware (or cookie sheet) about 3 inches apart.
5. Cover with a tea towel and let rise for 10 minutes. Bake at 425 for 19-12 minutes or until a golden brown color on top. I like to rub some butter and garlic salt on top for flavor when they are almost done browning in oven.
I love to serve these warm with burgers fresh off the grill... Yum, taste so good every time. These are a bit heavier then your typical white flour 99 cents buns from the store, but I think you'll enjoy the difference! Serve with a smile....and enjoy with your crew!
Monday, January 14, 2013
Sweet Blueberry Muffins
Looking for an easy, but oh so tasty home-made muffin recipe? This will honestly take you 10 minutes to throw together and another 20ish to bake. Make it in the morning, take your shower, and they will be done when it is time to feed the crew. This is also a yummy option for afternoon guests or an after school snack or over-night guests! I love fresh blueberries and when I find a good price on them I stock up my freezer. Those come in handy for days like today...

Sweet Blueberry Muffins
3 cups flour
1 cup sugar (I use only 3/4 cup for mine usually)
4 Tsp Baking Powder
1 Tsp salt
1/3 cup buttermilk
1/3 cup milk
1 Tsp lemon juice
1/2 cup vegetable oil
2 large eggs (fresh from your backyard chickens if you have them!)
1-2 cups fresh or frozen blueberries
2 Tbsp Sugar (for sprinkling before you bake them)
Heat your oven to 400.
Combine your dry ingredients in a large bowl, make a well in the center and add rest of your ingredients Fold your blueberries in last. This will be a thick batter, just moistened enough to mix all your ingredients. Spoon into a well greased or paper-lined muffin pan. (I highly recommend investing in a good stone muffin pan for perfectly baked muffins every time! I love my Pampered Chef!) Sprinkle tops of muffins with a bit of sugar.
Bake at 400 for 20-25 minutes. Muffins should be a light golden brown. Makes 12.


Sweet Blueberry Muffins
3 cups flour
1 cup sugar (I use only 3/4 cup for mine usually)
4 Tsp Baking Powder
1 Tsp salt
1/3 cup buttermilk
1/3 cup milk
1 Tsp lemon juice
1/2 cup vegetable oil
2 large eggs (fresh from your backyard chickens if you have them!)
1-2 cups fresh or frozen blueberries
2 Tbsp Sugar (for sprinkling before you bake them)
Heat your oven to 400.
Combine your dry ingredients in a large bowl, make a well in the center and add rest of your ingredients Fold your blueberries in last. This will be a thick batter, just moistened enough to mix all your ingredients. Spoon into a well greased or paper-lined muffin pan. (I highly recommend investing in a good stone muffin pan for perfectly baked muffins every time! I love my Pampered Chef!) Sprinkle tops of muffins with a bit of sugar.
Bake at 400 for 20-25 minutes. Muffins should be a light golden brown. Makes 12.

Serve 'em up with a smile...and enjoy sweet blueberry goodness!
Saturday, January 12, 2013
Garlic Chicken Pasta
Here's a little background information about me...I waitressed my way through college at one of the best family owned restaurants in town. Five years at one place and I still love going back. The Brown Bottle taught me a lot about taking care of people well during their dining experience. I actually loved this job, despite long hours on my feet and up and down the stairs, but mostly loved the people that mentored me through those years of my growing up. Today it is still, in my opinion, the best place to eat in town and I still love the owners and manager!
The Brown Bottle's garlic chicken is my absolute favorite dish there and I would never even come close to preparing such a fine dish...but I did attempt to make a close version of it for my own taste bud's sake. I am happy with the outcome, but if you want the real deal...head on over to the Brown Bottle in Cedar Falls!! You'll get the best service and food in town! But if you want a meal at home...may I suggest trying this?
Garlic Chicken Pasta
1 double breast of chicken
veggies of choice: (for this batch I used)
1 green bell pepper
1 small head of broccoli
half bag of baby carrots
fresh mushrooms
(could use: onion, tomatoes, pea pods, yellow bell peppers, zucchini)
pine nuts (1 small bag or about 1 cups worth)
olive oil
fresh ground pepper
garlic salt
garlic powder
1 box of angel hair pasta
Dice your raw chicken and sprinkle with garlic salt. Pour 1 Tbsp of olive oil in a large skillet. Once oil is warm, throw your chicken in and cook evenly for a white but not brown look. Once chicken is all cooked through, set your chicken aside in a separate bowl for now.
Boil your water for your pasta at this time and toss your noodles in the boiling water to cook as you start your veggies.

As your chicken cooks, slice your veggies to your liking. I slice my baby carrots in fourths to help them cook faster.

Add another Tbsp of olive oil to your skillet and add your more dense veggies first. I add my carrots and let them saute for a bit, then add my peppers, next my broccoli, and last my mushrooms. This way I don't have some veggies overly done while my heavier veggies finish cooking through. As my veggies cook, I sprinkle with pepper, garlic salt, and garlic powder to my tasting. Season away as you please!
Once all my veggies are done, I throw in the pine nuts to toast for just a couple minutes. You might need to add a bit more olive oil if it seems dry or your veggies are sticking to the bottom of your skillet.

Your noodles should be ready to drain by now and your veggies are done. Throw your chicken back into the skillet, drain noodles, and simply toss the skillet veggies and chicken with your noodles.

You should have yourself a light pasta dish ready to eat right away! I had no problem serving this dish with a smile and fully enjoying! Yum!!
Thursday, January 10, 2013
Cheesy Potato Soup
If I lived by myself, I would live off of soup. But, I don't (thank goodness), so I have a hand full of soup recipes that I love and can even convince my house full of boys to enjoy for a meal or two with me! Soup is my go-to meal on weekends in the winter. You can throw it together in the morning and it is warm in the crock-pot all day. My husband says cheese is the compliment to every dish...so this cheesy potato soup might be towards his fave of the soups I place before him when I am sure he would rather have meat and potatoes!! I have been making this for years and it never disappoints. I hope you'll give it a try.
Cheesy Potaoe Soup
1 1/2 cups chopped carrots
1 1/2 cup chopped celery
5-8 cups diced potatoes (I like thicker soup, so I do more potatoes)
2 tsp. salt
1 can evaporated milk
2 Tbsp fresh parsley (or flakes)
1 cup milk or half & half
1 lb Velveeta cheese
1/4 cup butter
2 cup cubed ham or bacon (we prefer ham)
pepper (to your tasting)
Chop all your veggies and place in a soup pot.


Turn the heat off and add all your remaining ingredients.

Turn your heat on medium and bring to a bubbley stage. once it is bubbely, turn to low and stir occasionally.

I like to let it sit for awhile to thicken, but you can eat it right away too!

Mmm-mmm...and as always, serve with a smile and enjoy :)

Monday, December 31, 2012
Frozen Hot Chocolate!
I don't know why I never attempted this before? I have heard people rave about it all the way from New York's famous Serendipity and I love a good hot chocolate ...so why did I not think of this before!?!? Well, good thing it's never too late and we made a quick run to our local all night grocery store last night to create this oh-so-tasty masterpiece before we snuggled in for a movie. Worth spending an hour reading about different recipes, worth going out into the cold to get just perfect ingredients, worth making mess in kitchen after all other dishes were done for day, and worth baby making art with it all over the table as the rest of us indulged. If that doesn't convince you...just make it, you won't regret it! It is really too easy and too tasty not to.
.jpg)
Frozen Hot Chocolate
2 cups whole milk (I would not exchange with anything different)
Five 1.25 ounce packets of Hot Chocolate mix (You can do less, but we loved it with five)
.jpg)
Frozen Hot Chocolate
2 cups whole milk (I would not exchange with anything different)
Five 1.25 ounce packets of Hot Chocolate mix (You can do less, but we loved it with five)
4 cups ice
1 cup heavy cream
2 1/2 tablespoons granulated sugar
mini chocolate chips
Chocolate syrup
1 cup heavy cream
2 1/2 tablespoons granulated sugar
mini chocolate chips
Chocolate syrup
I have a really nice blender, so it made the ice blend into a perfect consistency. Use the highest powered blending machine you own! Simply pour your whole milk and hot cocoa packets into blender. Blend well. Add your ice and blend until a whipped like frozen consistency. You will have yummy ice crystals gathering to top.
Once this is done, pour your heavy whipping cream into a bowl large enough to use your hand mixer in. Add your sugar and blend until you have home-made whipped topping! You could swap for ready made Cool Whip, but I promise this extra step is worth it!
Give your frozen chocolate mix a quick last minute blend and pour into cups, spoon a big dallap of whipped topping on it, sprinkle with mini chocolate chips, and drizzle chocolate syrup over it. And as always, serve with a smile and enjoy!!!
(This serves about 4-5 people...we doubled it :)
Tuesday, November 13, 2012
brrr...it's Chili!
As the cooler temps have settled in to stay, most find a big of pot of chili resting on their stove-top. If you haven't yet, now is the time to try it! Chili is one of my favorite soups to make because a.) it's filling b.) it's good and c.) it's easy. Served with some home-made cornbread and you've got yourself a real treat for a few days! The beauty of it too, is that you can pretty much do whatever you want with it. Make it simple or zesty as you please...it turns out different every-time here and that's just the fun of a good chili "recipe".
Mama's Chili
1lb ground beef
1lb pork sausage
hand full of carrots
few celery stalks
1 red onion
1-3 peppers (I used sweet peppers this round)
purple cabbage (only because I needed to use it up)
1-2 can red kidney beans
1-2 cans chili beans
tomatoes (This can vary)
I used 9 frozen tomatoes from my garden, just puree them
2 cans tomato soup
2 cans diced tomatoes
dash of garlic salt or powder
chili seasoning to taste
Simple chop all your veggies and cook over medium heat with your beef and sausage. Once this is all cooked through, start dumping in your tomato varieties and beans. Once you have the consistency you'd like (some like more liquid, some like thick chili), add your seasoning. Let it simmer for an hour for best results and eat with warm cornbread! As always, serve with a smile and enjoy! (Best enjoyed with friends added to your table too...just sayin!!)

As much as I can, I get veggies into my meals. Chili is just too easy to sneak a little or a lot in!

Cooking your veggies with your meat is a must to get the desired non-crunch feeling in your mouth.


I love, love fresh garden tomatoes pulled from my freezer for winter cooking!! It adds so much real flavor.

Now, don't be like me...I burnt this batch. Awful, just awful. Another easy option is to throw it into a crock-pot for the day...no burning and plenty warm for dinner still.
Friday, November 2, 2012
Mama's Chicken Noodle Soup
I love food. I was going to type I love fall foods, but then come spring I would write I love fresh spring salads and come summer I would write I love summer foods with grilling and sweet corn. So I might as well be honest and just say...I love food, all seasons of it. Food leaves a taste in your mouth and memory from when you ate it and with who and what is represents. The way cherry cheesecake makes me think of my grandma's table and eating it after many of her yummy meals and ham and potato soup reminds me of my other grandma's house on Christmas day and home-made bread makes me think of my mama in her own kitchen. Food for me is a connection to many hearts in my life and with it I hope to do the same. Food brings people together and good food keeps people coming back! Good food and good people...doesn't get much better!
With fall comes my taste buds ready for soup season. I personally could live off soups this time of year, but my house full of growing boys would tell you something very different. I have made a variety of the basic chicken noodle soup and this one is my favorite. I never make two soups the same, so bear with me as I walk you through this one...one of my weakness's....I never write my recipes down as I make them and often can't remember what exactly I did. Just tweak this a bit to your tasting as you go :)
Mama's Chicken Noodle Soup
1 bag frozen chicken breasts or tenderloins
olive oil
kosher salt
fresh ground pepper
fresh or dried parsley
chicken broth (anywhere from 3-6 cups)
carrots
celery
Reames frozen home-made noodles (Do not use anything else! These are the best, I promise! I think the Amish would even agree :)
heavy whipping cream
Begin by baking your chicken. I put olive oil on a good stoneware pan, lay my frozen chicken out, and sprinkle with salt and pepper. Bake at 350 just until chicken turns white. Do not over cook or it will be tough meat in your soup.

In a pan large enough to hold soup, pour in your chicken broth. I use 2-3 boxes depending on how much I want to make. Then start adding your veggies...

I almost always use carrots and celery, but sometimes I just clean my fridge out too with left-over veggies like corn or peas. Chop your veggies and throw into pot of broth. Let cook until carrots are tender. As your veggies cook throw in some seasoning...I like kosher salt, fresh ground pepper, and some freshly chopped parsley. You could use anything you like though and even add some onions if you wish.

This is where you must follow exactly, the only thing I always do the same. use Reames frozen home-made egg noodles. I can't even make home-made noodles that taste this good. I love these. I will say it again, I love these. Once your veggies are tender, pour a bag of these tasty things in your soup. While they soak up some juice, you have two options...1.) leave your soup as is with broth. 2.) Give it a creamy taste and texture by pouring in some heavy whipping cream. I usually do about 1- 1 1/2 cups. Its the good stuff!

Your soup is ready to enjoy once the noodles are cooked and it's nice and hot! As always, serve with a smile and enjoy!!!

Subscribe to:
Posts (Atom)